|
These instructions utilize fresh grapes for the creation of premium wines. For techniques on making wine from juice or concentrates please see our section "Making Wine From Juice or Concentrates". These instructions use fresh grapes. |
|||
|
The ValleyVintnerTM |
|||
|
Key Note: Keep a journal on your measurements and dates. Include Date, Wine type, Starting Brix (Sugar), Temperature, Specific Gravity, PH, Acidity and any notes on color, smell or other comments for future recall. These will be used to track your wines progress and for future reference. |
|
Equipment:
Refractometer Hydrometer Primary Fermenter ( 20 gallon min per 100 lbs ) Cap Masher (punch) Air Lock 5 Gallon Carboys pH meter Acid test kit Sulphite test kit Siphon & Hose Crusher & Wine Press
Making wine from fresh grapes allows the Vintner full control over the wine making process. It's not difficult and follows pretty much the same process as making wine from juice or concentrates.
A few key's to making certain you have a successful "Crush". First, always use the best fruit, freshest yeasts, and ingrediants. You need to know the Brix (sugar), Acid, and pH levels of your fruit. Later you will need to measure the free Sulfur (SO2) to maintain the health of your wine. These are easy to measure and important for a stable, quality product. Second don't use badly sunburned or raisened fruit unless you intend to make port or brandy. Third, as with making wine from juice or concentrates, sanitize everything that comes in contact with your wine. Mix up a gallon of sulphite solution (3 Tablespoons to gallon of water) and use it to rinse or spray everything that comes in contact with your wine.
Let's start!
In Northern California we're blessed with nearly perfect conditions for wine grapes. The geography, soils, cool nights and hot days are ideal providing the perfect balance of Sugars, Acids, and Flavors.
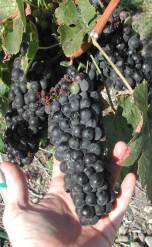
1.) Grapes - For Red Wine, grapes should have a starting Brix between 22-25%, an acid of .6 - .9 grams/Liter, and pH of 3.2-3.6. White Wine grapes should have a Brix slightly lower between 22-24%, higher acid in the range of .7 - .9grams/Liter, and pH of 3.2-3.5. Measure the sugar in the field with a refractometer before harvest or specify these parameters and request a data sheet from your grower. Either way be certain to measure these components using a refractometer (or hydrometer), acid kit and pH meter.
2.) Here we can have some fun. Depending on your volume and preference, you can Crush grapes using a mechanical Crusher or call your friends and family to come stomp the little fella's into mash. Mechanical crushers are available from small home machines designed to conveniently handle 100 lb's to professional multi-ton machines. Whatever method be sure the instruments are cleaned. Crush Red grapes or Press White grapes (some crush White grapes and let the juice and skins stew for 24 hours before pressing) into your primary fermentation tank and let the must sit 24 hours before adding yeast. Use this time to measure and if necessary adjust sugar and acidity before starting fermentation.
Immediately after crush dissolve 1/8 teaspoon of metabisulfite per 100 lb's of grapes in a cup of water and stir into your freshly processed must or juice. You want to keep the sulfite level under 50 ppm to provide adequate protection against spoilage but not hinder the yeasts ability to complete fermentation.
Note: Red wine grapes are crushed and then fermented on their skins to extract color and flavors. White wine grapes are immediately pressed and only the juice is fermented.
From this point White wine made from fresh grapes or made from fresh grape juice is processed the same (we'll discuss barrel fermentation of White Wines in our professional tips section). Red wine however takes a bit more effort,,,
3.) Maceration (Red Wine) - Red wine draws it's color from grape skins, hence the juice needs to be in contact with the skins to extract color and flavor characteristics. This extended contact with skins is called Maceration. Premium Wineries with the ability to control environmental factors (oxygen and temperature) often extend maceration 21 days or longer before initializing fermentation. Most small vintners lack the controls to protect against spoilage and thus start fermentation shortly after crush. Some small vintners convert a chest freezer adding an external thermostat for temperature control and a valve to inject CO2 or Nitrogen. This allows them to control the environment and extend maceration.
4.-a) Primary Fermentation (Red or White Wine) - After you've made any necessary adjustments for acid and sugar you're ready to start fermentation. Yeast selection has a significant impact on wine flavor. Consult a yeast selection chart or your local supply store for the characteristics you what your yeast to impart in your finished product.
Starting must temperature should be between 65o - 85oF for Red wine and between 55o - 80oF for White. Re-hydrate your yeast for 15 minutes or in a cup of warm (under 100oF) water. Stir the yeast into your must and cover your fermenter. Fermentation should start in 24-48 hours and last 1-2 weeks.
4.-b) Secondary Fermentation (Red Wine)- After the 4th or 5th day of primary fermentation add your Malo/Lactic culture to the must.
Note: Most red wines benefit from a secondary fermentation called Malolactic conversion. Malic acid is a naturally occurring tart flavored acid that bacteria convert to a smoother lactic acid over the course of several months. This conversion is highly recommended for full bodied red wine and has been used on occasion in Chardonnay. It is not recommended for crisp white wines.
5.) Cap Management (Red Wine) - In the process of converting sugars to alcohol yeast create CO2 (carbon dioxide). In Red wine this gas pushes the grape skins to the surface and forms a "Cap" above the fermenting juice. In order to extract color and flavor from the skins (and prevent spoilage) it is necessary to push this cap back down into the juice (at least twice a day) until fermentation has subsided. Use a stainless steel or oak tool to break up this cap and push it under the juice.
6.) First Racking - Measure the sugar conversion regularly with a refractometer or hydrometer and rack (siphon) the juice off the sediment and/or skins into a sanitized container when the sugar content approaches 0 Brix or around1.000-1.010 specific gravity.. Add 1/4 teaspoon metabisulfite per 10 gallons of juice to your wine. Leave a small amount of room in your vessel for expansion until fermentation has completed and install an airlock to prevent oxygen from entering the vessel. Store the container away from bright light and temperature fluctuations for approximately 10 days allowing heavy sediment to settle out of the wine. Then
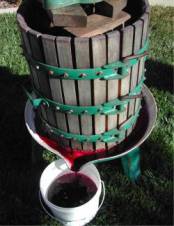
6-b.) Press (Red Wine) - Press the red grape skins to extract the remaining juice. This juice can be blended with the "free run juice" siphoned earlier or used to top up your barrels during subsequent rackings.
7.) Subsequent Rackings - After the wine has had time to settle and primary fermentation is complete (1-2 weeks), rack the wine into your aging vessel and seal with an air lock. You can age the wine in Oak Barrels, Stainless Steel containers, or Glass Carboys (use oak cubes or staves in Stainless or Glass containers). Top up your containers at this and every racking. You want to minimize your wines exposure to light and oxygen. A blanket of CO2 or Argon is often used in large storage containers.
Rack Red wine 2 to 3 more times over the next 12-18 months to clarify your wine. Add protein stabilizer and fining agent to white wine and rack off it's sediment as well.
White wines benefit from an extended "Cold Stabilization". Refrigerating your wine between 25o - 35oF for 1-2 months will help to precipitate out undesirable Tartrate crystals that would later show up in your bottles.
8.) Bulk Aging - Red wine should bulk age for 18-24 months and then bottle aged further. Most white wines should bulk age for 12 months before bottling.
9.) Ready to bottle! If your wine is clear, stable (finished fermentation) and cold stabilized you are ready to bottle. You can chose to filter your wine or go straight to the bottle. We prefer to filter only white wines, however either or neither works well. If filtering, make certain you have the appropriate grade filters or you could strip color and flavor from your wine. A few days before bottling add 1/4" tsp metabisulfite per 10 gallons or "Crushed" Campden tables (1 per gallon) to your wine and mix thoroughly.
Let it age! Wine initially experiences "Bottle Shock" and needs time to develop it's bouquet. Although immediately drinkable both red and white wines get much better with time. The difference between 1-2 months and 1-2 years in the bottle, is the difference between friends singing praises on your behalf or quietly commenting on your interesting hobby. |
|
|
|
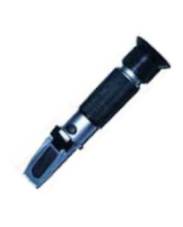
Use a refractometer to determine the sugar content of your fruit. Squeeze 2-3 drops of juice onto the lens and measure in degrees Brix. Red Grapes should range between 22-24%, White Grapes 22-23%. Adjust sugar if necessary before fermentation. |
||
|
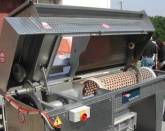
Mechanical Crusher/Destemmer used on the winery (4 tons per hour capacity).. |
|
||
|
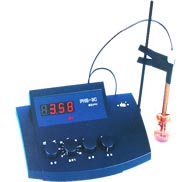
Use a pH meter to measure pH and acidity. Titrate to 8.2 using 1N Sodium Hydroxide to determine total acidity (TA). |
||
|
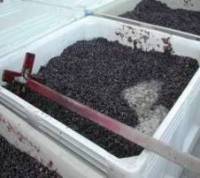
Red wine grapes are crushed and then fermented on their skins to extract color and flavors.
|
|
||
|
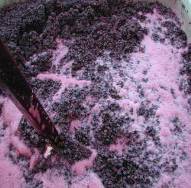
Cabernet Sauvignon in primary fermentation. Punch down the cap twice daily. |
||
|
Press the red grape skins to extract the remaining juice. This juice can be blended with the "free run juice" siphoned earlier or used to top up your barrels during subsequent rackings. |
 |
||
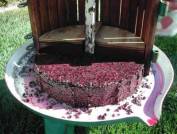 |
"Grape Cake" pressed grape skins. |
||
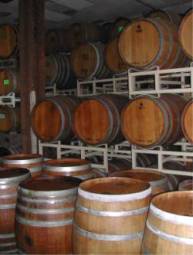
| Reds are aged for 18 months in Oak Barrels. |
|
||
|
|
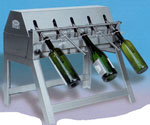
Manual 5 Bottle Filler ! | ||
